BLOG
5 Simple DIYs That Make the Perfect Gift for Your Valentine
Back to the blog
Valentine’s Day is the best. This day of romance and friendship makes the most anti-warm and fuzzy person feel a bit brighter. Hey, who can hate on any holiday that encourages you to belt out sappy songs, all in the name of love? But, like most other holidays, the gift-giving aspect of February 14th can be a bit of a stressor for couples and non-couples alike.
Strapped on cash but in need of a Valentine’s Day present that will set your loved one’s soul aflame? If you want to give a small gift that doesn’t scream “I paid 5 dollars for this,” first of all, join the club—we’ve all been there whether we care to admit it or not. Secondly, with a little bit of initiative, some elbow grease, and a few bucks, it’s incredibly easy to create simple and fun DIY gifts for every type of Valentine.
Check out uCribs’ compilation of the 5 best DIY Valentine’s Day gifts that will make you feel like a total rockstar when you reply, “Yep! It’s handmade.”
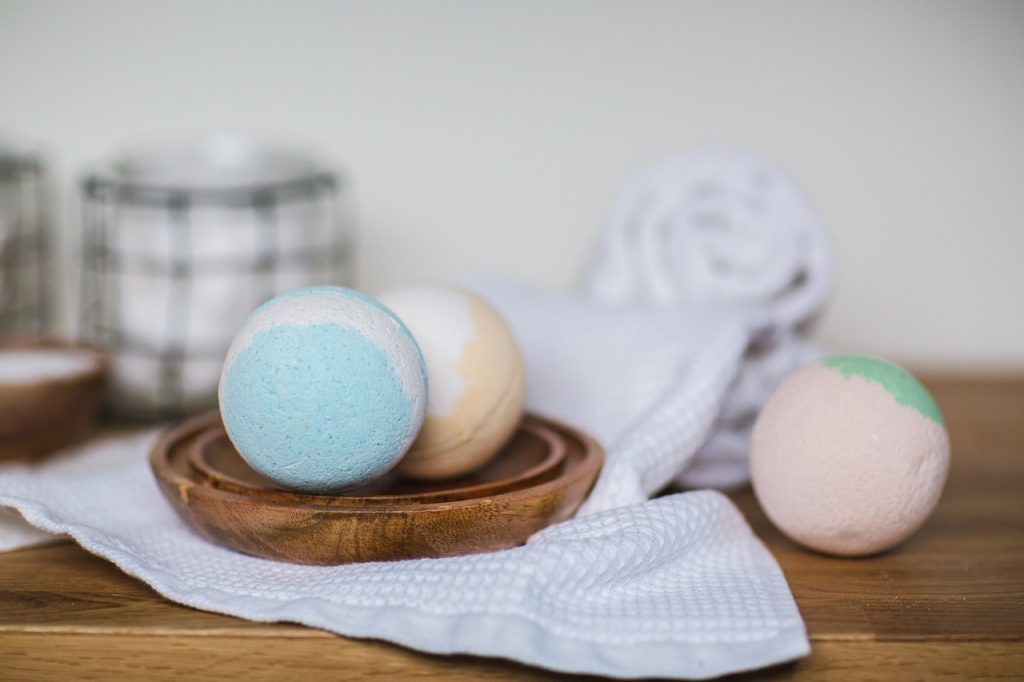
For the Valentine Who Deserves a Bit of Pampering: DIY Bath Bombs
Valentine’s Day is pretty much synonymous with self-care, if you ask us. When else can you treat yourself to takeout followed by an entire bag of candy, guilt-free? (Your idea of self-care doesn’t involve candy binges? Anyway, moving on…) And when it comes to thoughtful gifts that encourage self-care, little tops a classic set of fragrant bath bombs. Great for stressed-out students, moms, and younger siblings— Hello, the beautiful changing colors! — these bath bombs might just give that expensive luxury set a run for its money.
DIY Bath Bombs
You will need:
- Citric acid (1 cup) *
- Baking soda (2 cups)
- Cornstarch (2 tablespoons)
- Shea or coconut butter, melted (1 ounce)
- Essential oil of your choice (5-6 drops)
- Red food coloring, if desired (1-2 drops)
- Spray bottle of Witch Hazel
- Silicone mold in the shape of your choice
*Citric acid may be purchased in the canning section of major retailers or in the soap-making section of craft stores.
Instructions:
- Prepare your work station with the measured ingredients and silicon mold. This process can be a little rough on your hands, so if you’d like, wear gloves during this project.
- In a large mixing bowl, combine the cornstarch, citric acid, and baking soda. Stir well until there are no evident lumps.
- Add in the red food coloring, melted shea or coconut butter, and essential oil. Mix well.
- Use the Witch Hazel spray bottle to spritz your bath bomb mixture 2-3 times. Mix well. The Witch Hazel helps solidify the bath bombs, so if your mixture isn’t holding a shape when pressed together, gradually add more spritzes of Witch Hazel.
- Once you’ve got a good consistency, press the mixture into the silicone molds. Be sure to compact them tightly, so that your bath bomb doesn’t break apart before use.
- Allow the bath bombs to dry in the silicon mold for 12 hours.
- After 12 hours of dry time, remove the bath bombs from the molds. Allow them to sit for an additional 24 hours. This will ensure that your bombs are nice and solid, just like the store-bought version!
For the Valentine with a Magnetic Personality: DIY Heart Magnets
We’ve all got that friend who could use a serious hand in the organizational department. You know the one – you’ve sent him endless links to KonMari blogs and even devoted an entire weekend to helping him reorganize his study space. Despite your best efforts, though, this friend still tacks everything – and we mean everything – to his refrigerator to keep his most important items within arm’s reach. You may not be able to teach a college student new tricks, but you can do the next best thing by arming your friend with an assortment of adorable heart-shaped magnets. Hey, if you can’t beat crazy clutter, you can at least make it cuter… right?
DIY Heart Magnets
You will need:
- Air dry clay
- Craft magnets or magnet tape
- Glue gun with hot glue sticks
- Paint (either acrylic or watercolor)
- Paintbrush
- Mod Podge (or another sealing agent)
Instructions:
- Roll the clay between your hands. Slowly start to mold it into a heart by pinching and pulling it into shape. Form as many as you like – bonus points for alternating sizes!
- Be sure to flatten the backs of each heart. This will make attaching the magnet easier.
- Once the hearts are shaped, allow them to dry fully. Depending on the type of clay, this could take anywhere from a few hours to a day or two.
- When the hearts are dry, take your craft magnets or magnetic tape and use your hot glue gun to adhere the magnet to the flattened backs. Ensure that the hot glue is dry before proceeding to the next step.
- Now, for the fun part! Using your brush and paint, add color to the front of the heart. Feel free to get creative with stripes, flowers, or different colors. Once complete, allow to dry again.
- Seal the heart magnets with Mod Podge for a nice, chip-free finish.
For the Valentine Who Nails #Adulting: DIY Heart Coasters
When it comes to college students, there are those of us who fight against aging and those who embrace it with open arms. Your grown-up Valentine is killing their real-world lifestyle with dreamy off-campus digs, a fridge full of nutritious food, and – most impressive of all – window coverings that actually match. Why not add something more to your Valentine’s ambitious lifestyle with a set of handmade coasters? Okay, so you may be wondering who on Earth under the age of 30 would get excited about coasters, but trust us, these coasters are incredibly thoughtful and stylish – just like your Valentine!
DIY Heart Coasters
You will need:
- Blank wood coasters (available at most craft stores)
- Acrylic paint (two colors of your choosing)
- Paintbrush
- Heart stencil, if needed
- Polyurethane clear gloss
Instructions:
- Place the blank wood coasters in front of you. Prep the coasters with a thin layer of polyurethane gloss if the finish is too rough.
- Once the gloss has dried, paint a heart in the center of the coaster. You can draw this yourself or rely on a heart stencil if needed.
- Repeat on all coasters. Apply a second layer of paint if the wood grain is still visible underneath the first layer.
- Once the hearts have dried, paint you and your Valentine’s initials on the coaster with a plus sign in between, i.e. A + B. Just friends? Feel free to omit the initials or include only your Valentine’s initial for a sweet personalized gift!
- Repeat on all coasters. Apply a second layer of paint if needed.
- Let sit until fully dry. To be on the safe side, wait approximately one hour before moving on to the next step.
- To complete your project, apply one final coat of polyurethane gloss over the painted design. This will lend the coasters a finished look and will protect your design from damage.
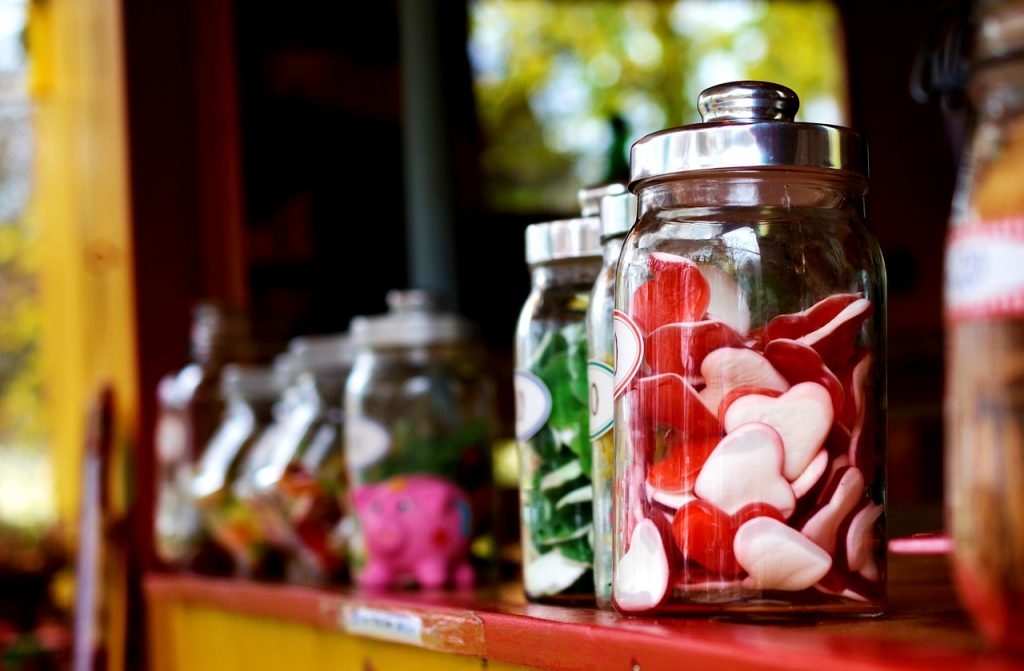
For the Valentine with an Insatiable Sweet Tooth: DIY Gumdrop Candies
Pressed for a good Valentine’s Day gift? When it comes to the sweetest day of the year, you can’t go wrong with sugary treats! Instead of opting for the usual conversation hearts, take this gumdrop recipe for a spin. Great for friends, professors, and even the nice librarian at the front desk, these gumdrops only look like they’re from a fancy confectionary. In reality, these candies are both shockingly easy to make and will take you back to your elementary school days when you were a non-stop candy guzzling machine. Hey, maybe you’re still the same way after all these years—either way, your secret’s safe with us!
DIY Gumdrop Candies
You will need:
- Sugar (2 cups, plus a little extra for rolling the candy in)
- Unsweetened applesauce (1 1/3 cup)
- Strawberry Jell-O (2 3-ounce packages)
- Unflavored gelatin (2 envelopes)
- Lemon juice (1 teaspoon)
- Cookie cutter, in any shape you like (we’re a fan of hearts!)
- 9×13” pan, greased
Instructions:
- In a medium pan, combine all of the ingredients. Let stand on the stovetop for 1 minute.
- Bring the mixture to a boil over medium heat. Be sure to stir occasionally. Let the mixture boil for 2 minutes.
- Once the timer sounds, pour the heated mixture into the greased pan. Do this quickly so that the mixture doesn’t firm up prematurely.
- Refrigerate the pan for 3 hours or until the gelatin has firmed all the way through.
- Once it’s firmed up, take a spatula and separate the gelatin mixture from the pan. Carefully transfer the soon-to-be gumdrops to a large cutting board. (If you don’t have access to a large cutting board, a smooth, sanitized surface will also work.)
- Cut the gumdrops into any shape you like. You can use a knife dipped in hot water, but we highly recommend using a cookie cutter to create perfect hearts, stars, circles – the possibilities are endless!
- Roll the shaped gumdrops into your extra sugar to give them that super-sweet coating.
- Allow the candies to sit out until they’re slightly dry to the touch. Then, they’re ready for wrapping or storing in an air-tight container.
For the Valentine Who’s Always Down for Fun and Games: DIY Dominoes
Pulling a fast one in the game of love isn’t cool – just ask anyone burned by a villainous Valentine. But, this DIY gift is one game we can all get behind: dominoes! Sure, you probably haven’t busted out your domino set in years, but this vintage game is still big on fun, even for the college crowd. With multiple variations of the game that allow plenty of outrageous rules, there’s no one way to play the game. For that reason, we think your Valentine should retire their dusty old set for this super-sweet version made by you. Who knows, both of you may even come up with a new twist on this classic pastime!
DIY Dominoes
You will need:
- Rectangular wood blocks or a blank domino set (28 total) *
- Scrapbook paper (a few sheets)
- Red, pink, or white puff paint
- A ruler
- A pencil
- Craft glue
- Scissors
*Create your dominoes using either standard wood shapes from a craft store or a set of blanks, which can be purchased via Amazon or Etsy. You can also do this the old-fashioned way with genuine wood chips – just be sure to sand them first!
Instructions:
- Spread your blank dominoes or wood blocks out on a table or other workspace. Using your ruler, lightly draw a line to indicate the halfway point of each block. This will help you in creating each end of the domino.
- Now, you’ll want to prepare the scrapbook paper, which will be cut into 56 small squares (two for each domino). You can either freehand this or use your ruler to measure each square into the perfect size. Queue up your Valentine’s Day playlist while you cut out all 56 squares.
- Once your squares are prepared, use your craft glue to attach them to each end of the dominoes. Allow to dry for approximately 30 minutes.
- Got your squares properly affixed to the blocks? Great! Next, use the puff paint to carefully draw “dots” on top of the scrapbook paper. If needed, use images of a standard domino set for reference. You can choose to keep things classic with small circles or give this project a flirty touch with small hearts. Regardless of what you choose, be very careful not to smudge your design as you’re working. Puff paint can be notoriously messy!
- Continue this process on every block. Allow to dry completely. Once the puff paint is set in place, you’re ready to go!
Share this article: